A low fade is a timeless haircut that suits nearly every style, offering a clean, polished look. Whether you're a DIY enthusiast trying to master this style at home or a barber wanting to perfect your technique, this guide will walk you through the steps to achieve the perfect low fade.
What is a Low Fade?
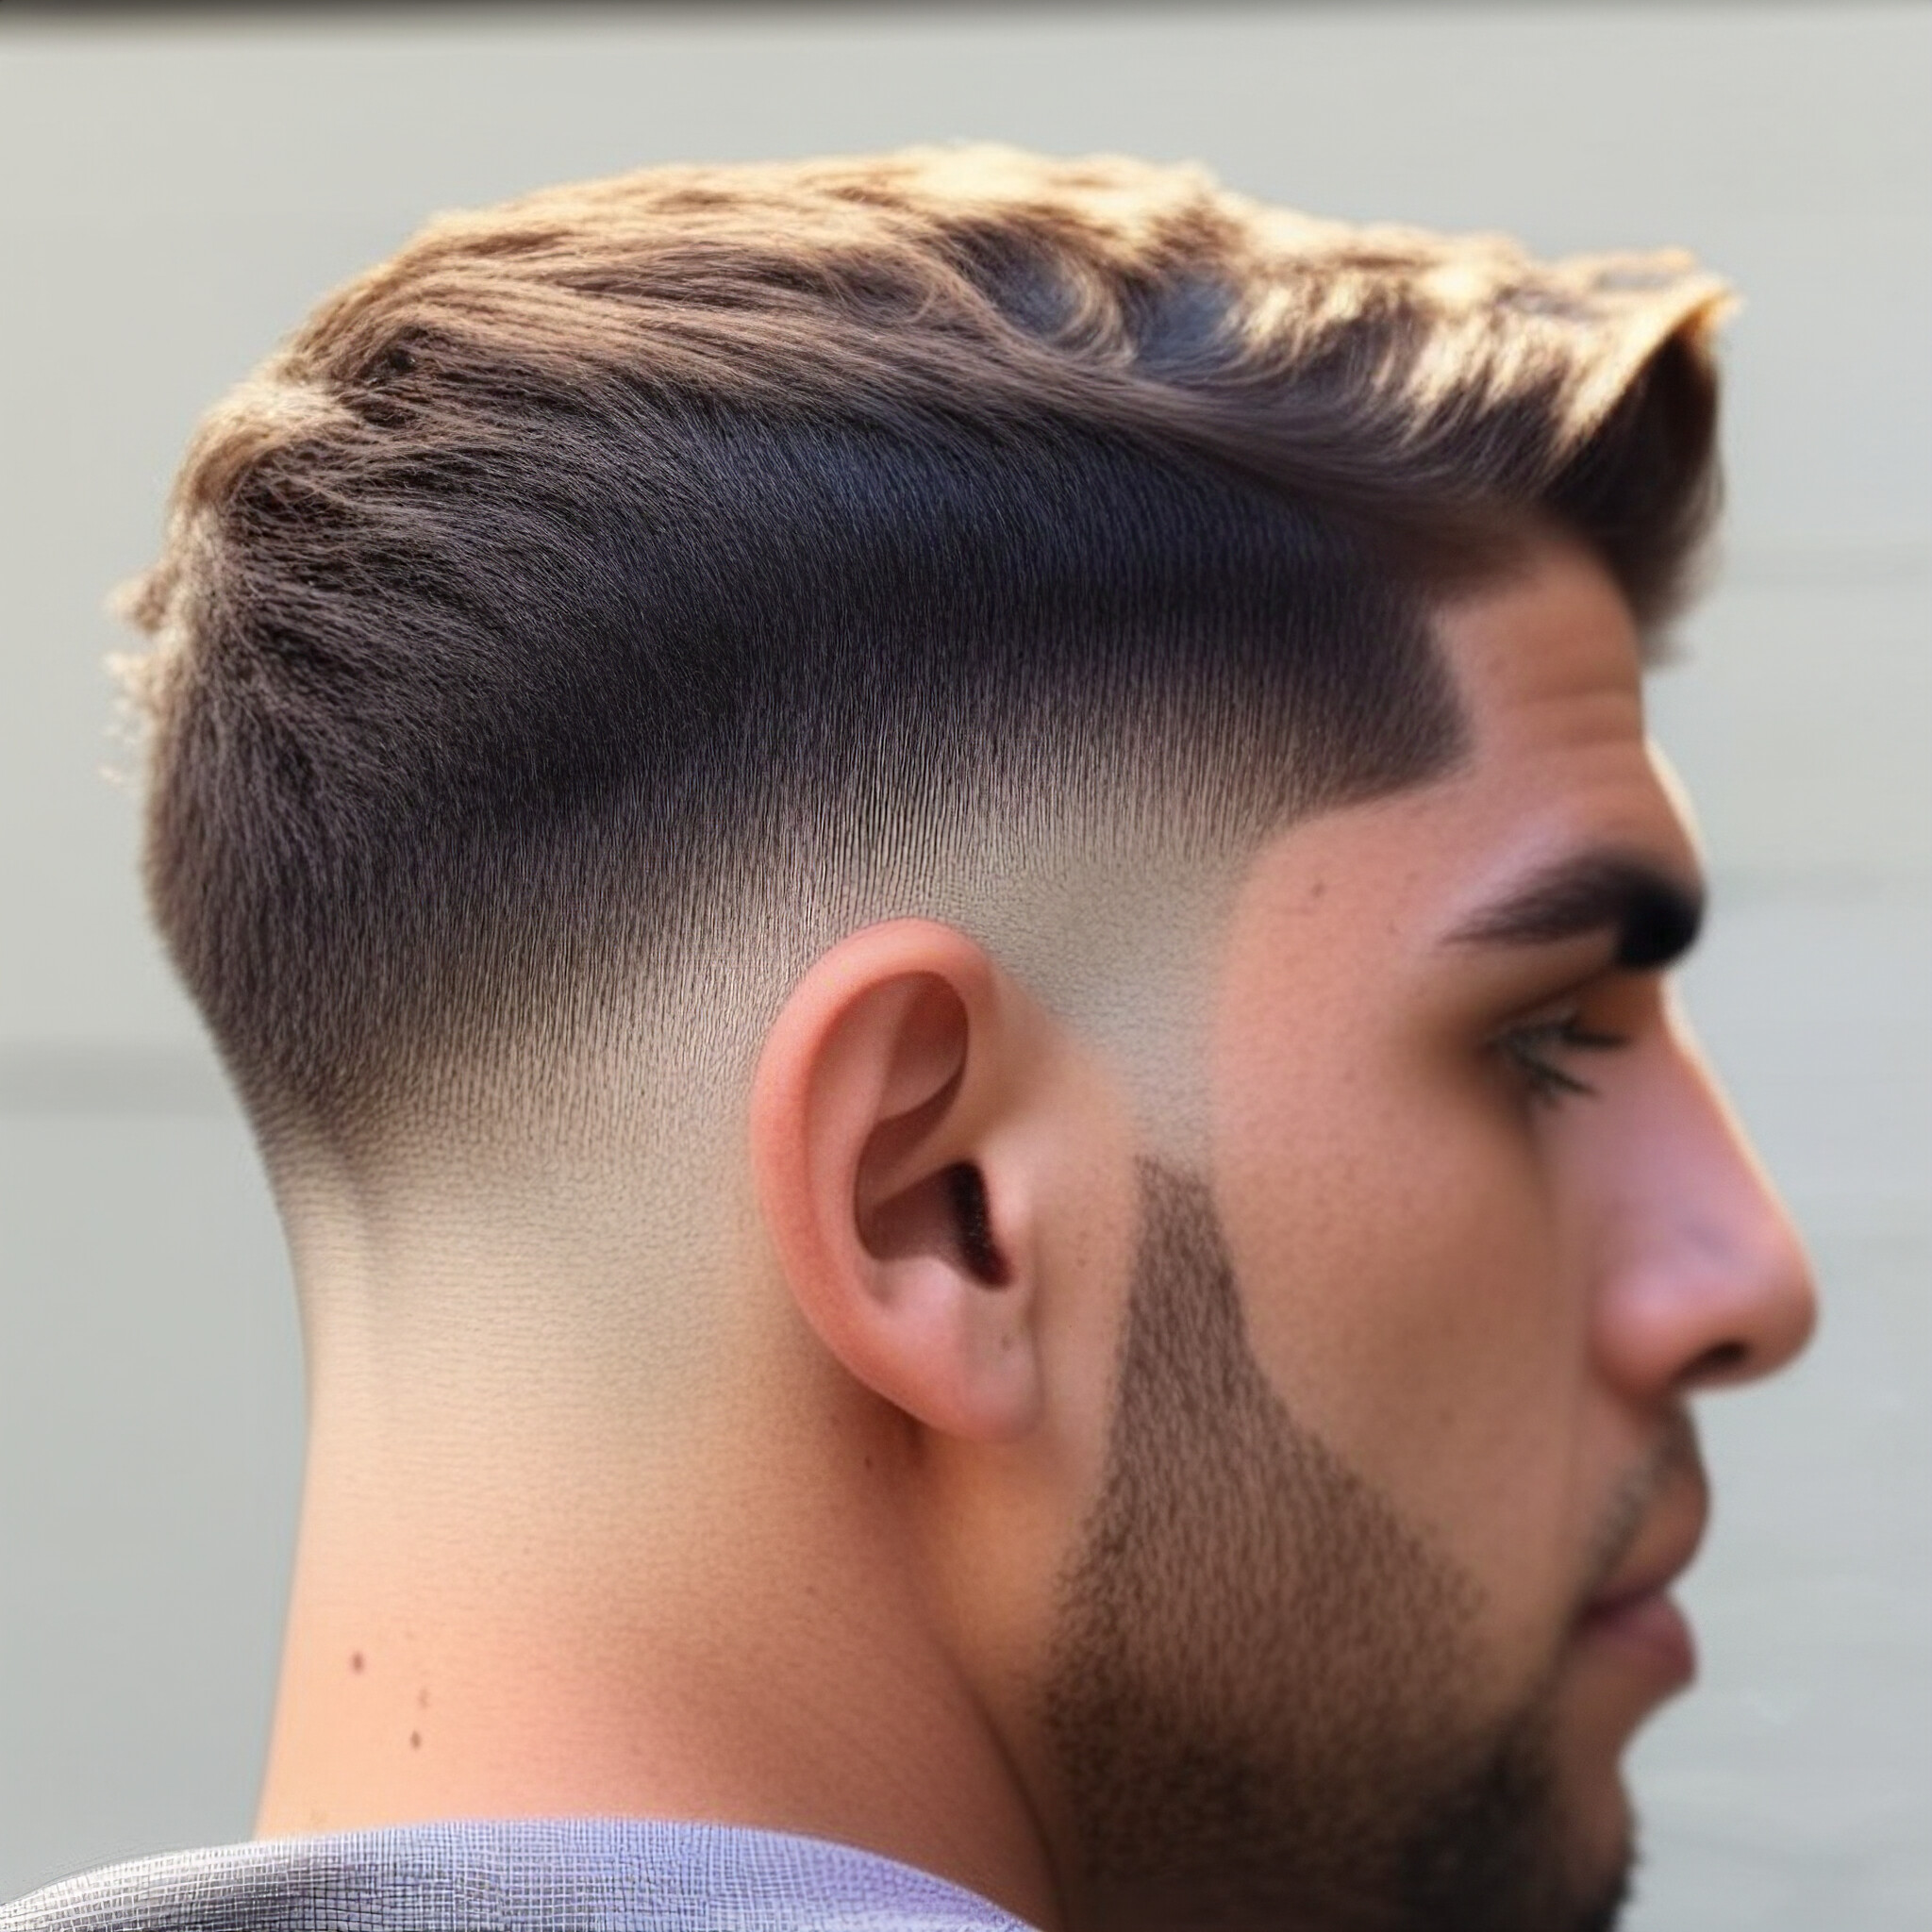
A low fade is a haircut where the hair tapers down gradually, starting from just above the ear and blending into the neckline. The fade starts lower than other types (such as mid or high fades), making it a versatile choice for those who prefer a more subtle, sophisticated look.

Tools You'll Need
To get the perfect low fade, having the right tools is essential:
Clippers (with guard attachments of various lengths)
Edgers or Trimmers (for precision around the hairline)
Scissors (for longer hair on top or detailed trimming)
Comb (to help guide the cut)
Handheld Mirror (if you’re cutting your own hair)
Spray Bottle (to keep hair slightly damp if needed)

Step-by-Step Guide to Achieving the Perfect Low Fade
Step 1: Choose Your Desired Length on Top
Before starting the fade, decide how long you want the hair on top. You can leave it longer for styles like a quiff, pompadour, or textured crop, or keep it short for something like a buzz cut or crew cut.
Pro tip: For a versatile low fade, keeping the top around 2 to 3 inches works well with most styles. Use scissors or clippers with a longer guard to trim the top as needed.

Step 2: Section the Hair
Part the hair into sections. If the top is longer, clip it up or use a comb to separate it from the sides. This makes it easier to focus on the fade without accidentally cutting into the top.
Pro tip: Using a comb to create a straight line between the top and sides can help guide where the fade will begin.

Step 3: Start with a Larger Guard for the First Layer
Begin the fade by using clippers with a longer guard (typically a #3 or #4) to cut the hair from the bottom of the head up to just above the ear. This will be your longest layer and the foundation for the fade.
Pro tip: Make sure to cut against the grain (the direction in which the hair grows) for an even result.

Step 4: Blend the Fade with a Medium Guard
Switch to a medium guard, usually a #2 or #3. Start a little lower than where the first layer ends, blending the hair further down toward the ear and nape. Move the clippers in a scooping motion to create a smooth transition between the longer hair on top and the shorter hair below.
Pro tip: Keep a steady hand and avoid cutting too much at once. It’s easier to cut more if needed than to fix a cut that’s too short.

Step 5: Create the Shortest Layer with a Low Guard
For the final part of the fade, use a #1 or #0 guard to cut the hair just above the ear and around the nape. This will create the signature tapered look of the low fade. Be sure to blend it smoothly with the medium guard layer by lightly overlapping the areas where the two lengths meet.
Pro tip: To avoid harsh lines, use a “lever open” technique on the clippers, which slightly increases the guard length, helping to soften the transition between layers.

Step 6: Refine the Fade
Once you’ve established the main fade, go back over the sections using a clipper-over-comb technique to refine any uneven spots. This helps smooth out any visible lines or patches and creates a seamless transition.
Pro tip: A handheld mirror can help you see the back of your head (or your client’s) more clearly to check for balance and consistency.

Step 7: Clean Up the Hairline
Using trimmers or edgers, clean up the hairline around the ears, sideburns, and nape. This will give the fade a sharp, polished finish. Be precise with your cuts to avoid going too high or unevenly shaping the edges.
Pro tip: Use a light touch with the edgers—pressing too hard can result in irritation or an uneven finish.

Step 8: Style the Top
Once the fade is complete, it’s time to style the top. Depending on the length, you can use pomade, gel, or wax to shape the hair. Whether you prefer a sleek slick-back, a textured crop, or a voluminous pompadour, choose a product that matches your desired hold and finish.
Pro tip: Use a blow dryer for added volume or to help set the style, especially if you’re going for a quiff or pompadour.

Maintenance Tips for a Perfect Low Fade
Regular touch-ups: Low fades require regular maintenance to keep the sides clean and sharp. Plan for touch-ups every 2 to 3 weeks.
Moisturize the scalp: After a fresh cut, use a lightweight moisturizer or aftershave to prevent irritation on the shaved areas.
Stay sharp: Use sharp, well-maintained clippers and trimmers for the cleanest results.

Conclusion
Mastering the low fade requires practice and attention to detail, but by following these steps, you’ll be well on your way to achieving a sharp, polished look every time. Whether you're styling at home or in the barber’s chair, a perfect low fade is all about clean transitions and sharp lines, making it one of the most versatile and popular haircuts for men.